I know I have taken a lot of time to publish this next update on the Kandan Redesign Project.
And I am sorry for that. Life became just too busy for me to design the pending features of Kandan that I had scoped in while starting this project.
I work full time as a Product Manager and that takes its toll when we start a new release of our product
But now that I have got some time to work on this project, I decided to design the Create, Edit and Delete features of a Conversation. This is what I had planned to do in the last article anyways.
So, as promised, here are the steps I took to design these features.
Designing Create Conversation Action
Designing the Create action of a Conversation was really not that challenging.
I knew the create page or dialog needs to be very simple and should at a minimum ask the user to input the name of the Conversation and let the user set the privacy policy for the Conversation (private or public).
And since the information to be asked from the user was very minimal, a dialog box was an obvious choice.
So I quickly put together the basic wireframe structure for the dialog box in place. Here is how it looked.
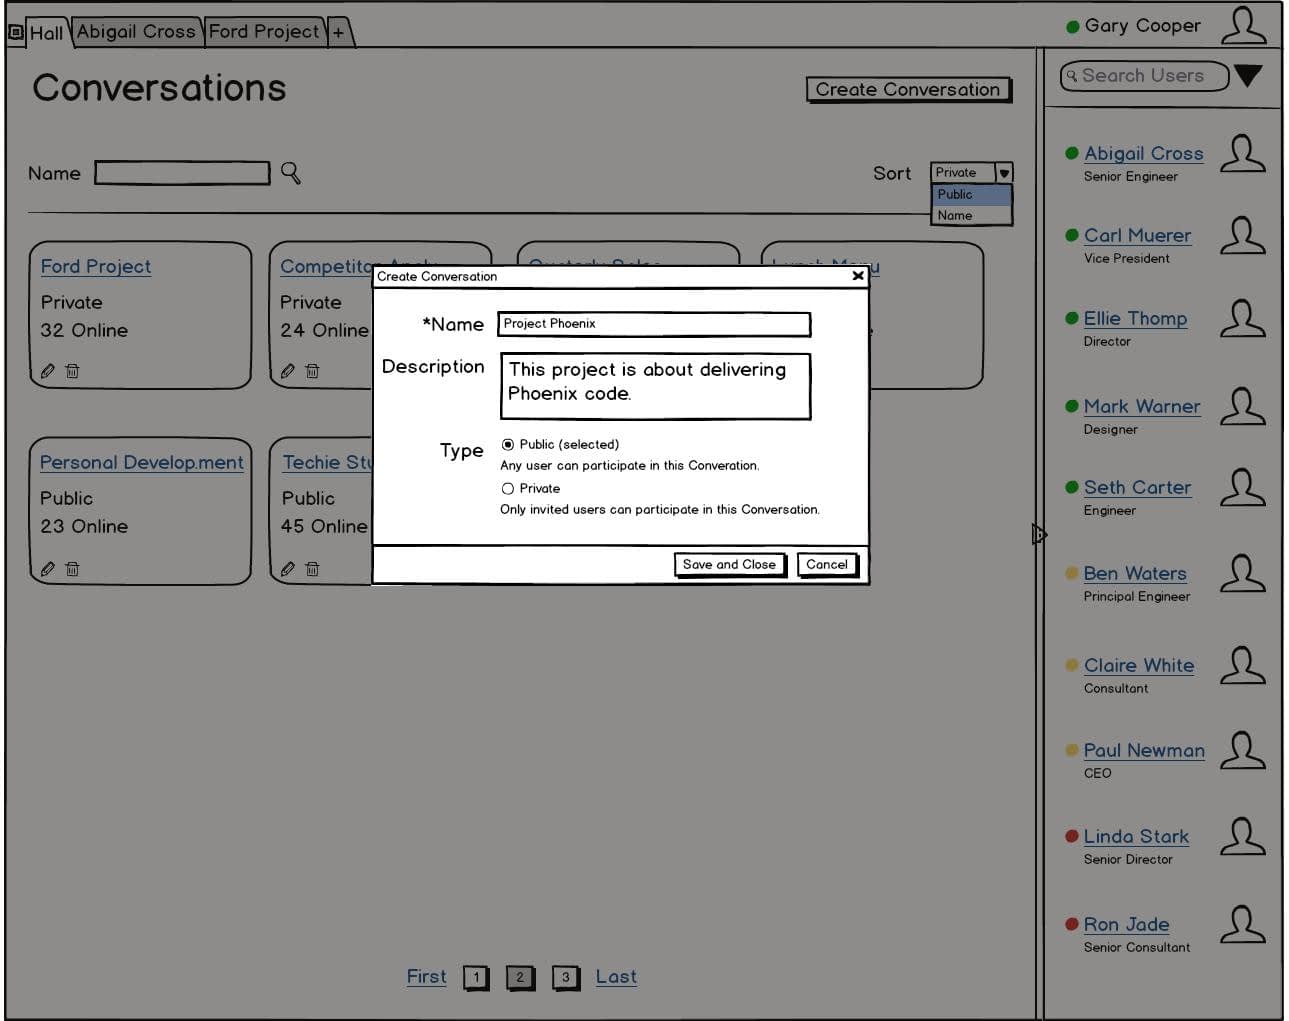
“Name” is a required field. So it is marked with the “Required” indicator. “Description” is optional. I added it so that users can use it to enter additional information about the Conversation if needed.
The next field “Type” will be used to define the privacy of the Conversation. Either it will be Public or Private.
Type is actually a required field. But since the value Public will always be selected by default, Type is not marked as required.
As I discussed in the scope of this project, Public Conversations can be accessed by any users. But Private Conversations can be seen only by those users who are invited to that Conversation.
That meant that I now need to give a way for the user to select the users who can actually see and use the Private Conversation being created.
It meant that on selecting the Private radio button, another dialog should get launched that would let the user select other users who can participate in the Conversation.
This resulted in designing the below dialog box for selecting the users.
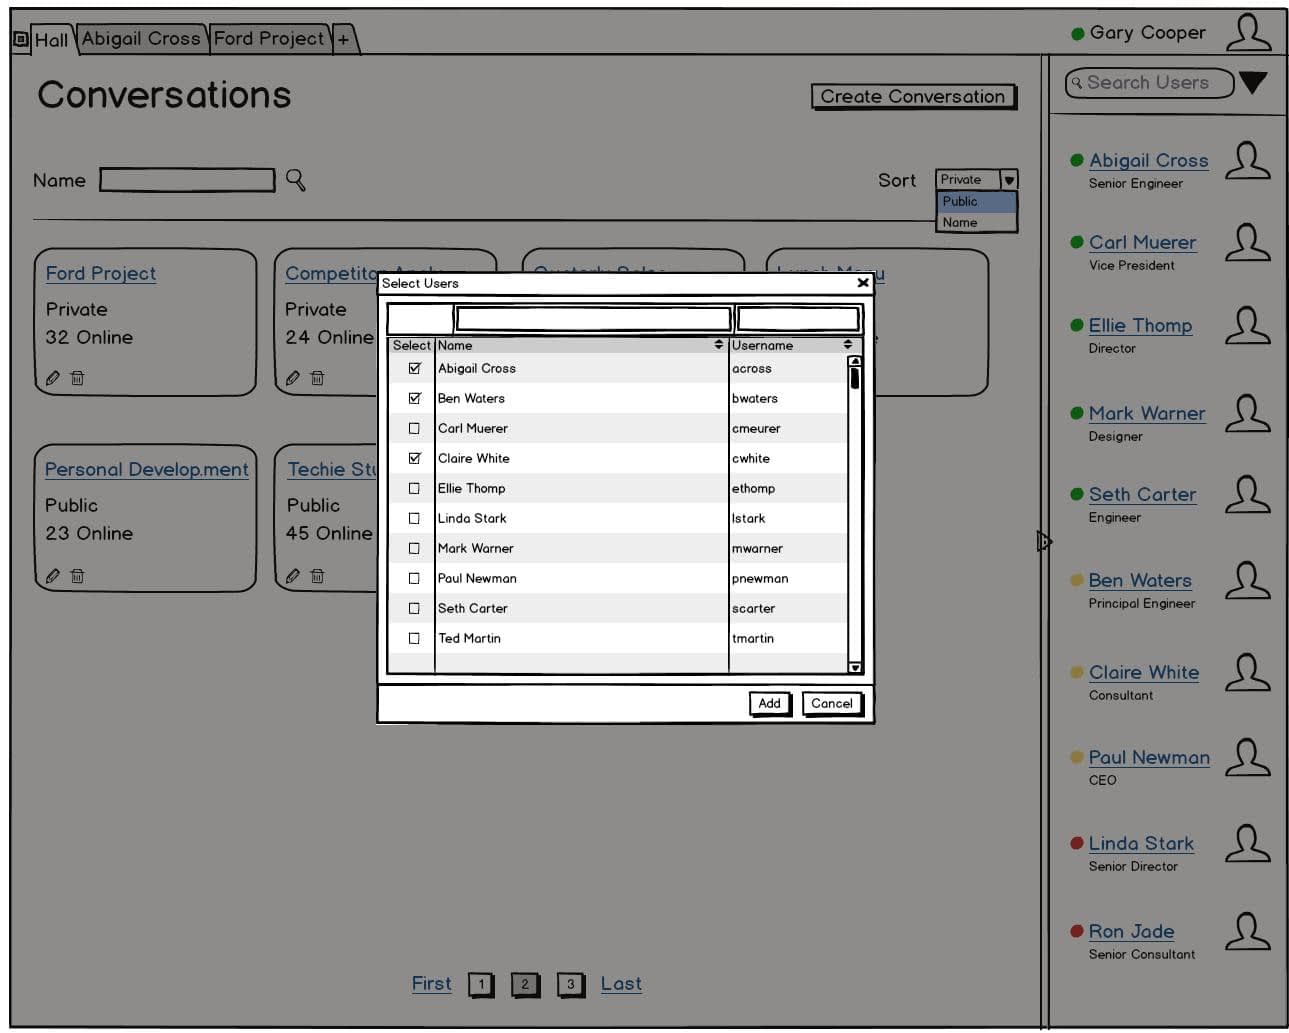
This dialog box is pretty self explanatory. But if you are wondering what those textboxes on top of the table would do then the answer is that they will help the user to quickly search for a user by Name or Username.
The user can type in the name or username of the user in the textboxes and hit Enter key on a PC. This would display all the users matching that name or username.
The user can select multiple users by using the checkboxes in the Select column.
The Select column does not have the search field on top because it makes no sense to have it.
Once the desired users are selected, clicking the Add button would add all those users to the Conversation and send them a notification that they have been added to the Conversation.
Clicking the Add button will close the Select Users dialog and place the user back in the Create Conversation dialog. But then the question arises as to how to inform the user that all the users which were selected have been added to the Conversation?
Ok, so I needed a success message in between which would tell the user that the selected users have been added to the Conversation.
Here is the how the success message would look.
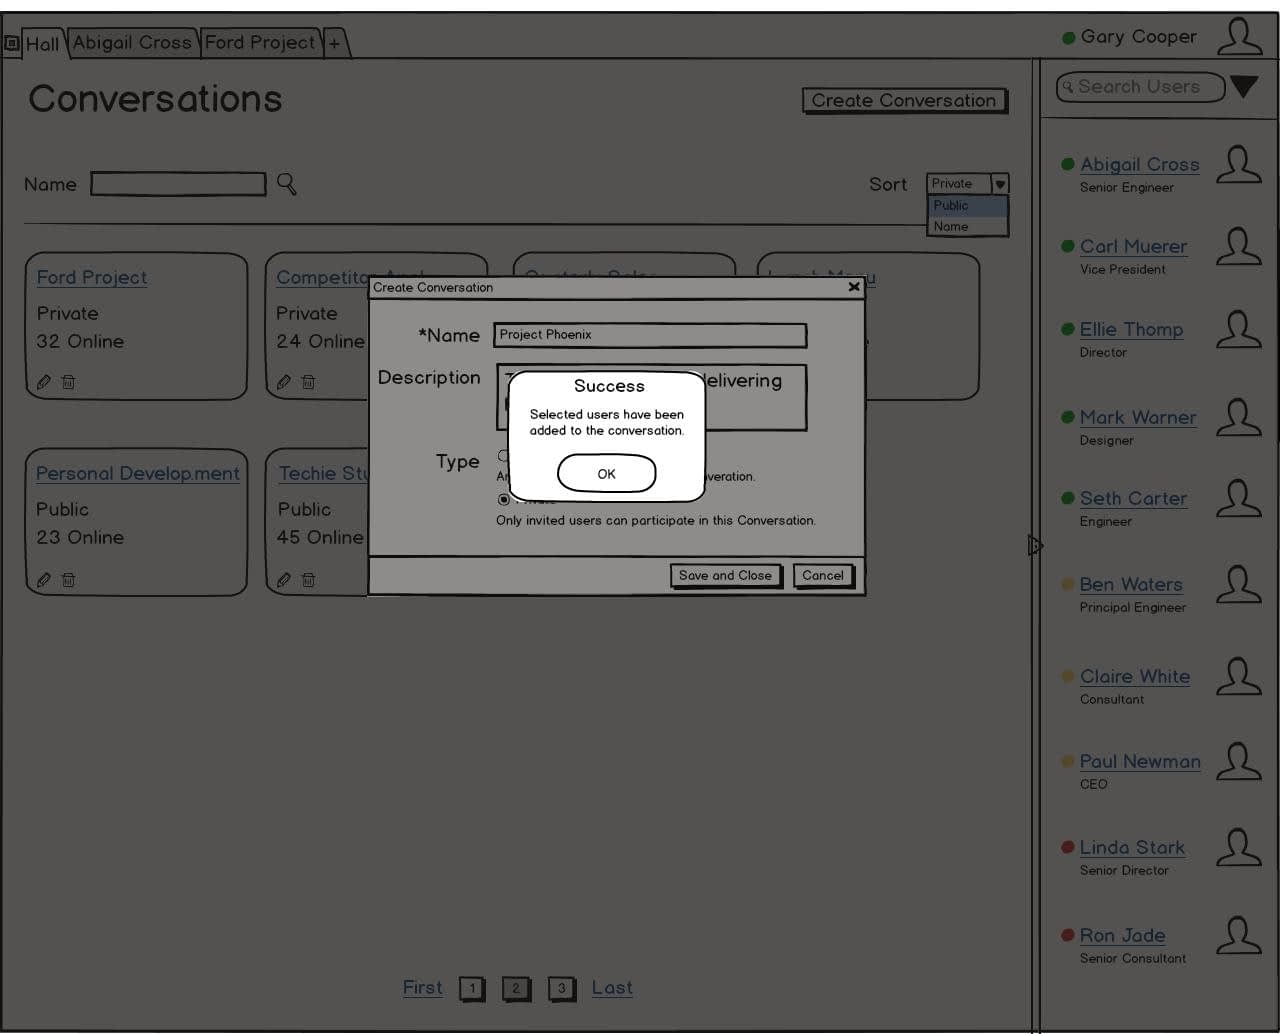
Now that the user knows that all the selected users have been properly added to the Conversation, clicking the OK button in the success message dialog would close out that dialog and place the user back in the Create Conversation dialog.
Once in the Create Conversation dialog, the user can click the Save and Close button which will result in the Conversation being created.
A new card would get created and displayed on the Conversations page.
Now, the thing that kept troubling me was that the newly created Conversation card may or may not show up as the first card on the Conversation page. This is because the cards are sorted by default on Type Private.
After a bit of thought, I realized that any user would expect to start the Conversation right away after creating it. It is very unlikely that the user would want to create multiple Conversations one after another.
This made the design decision simple. On clicking the Save and Close button on the Create Conversation dialog, the user would land up inside the Conversation. From here the user can start the Conversation with other members right away.
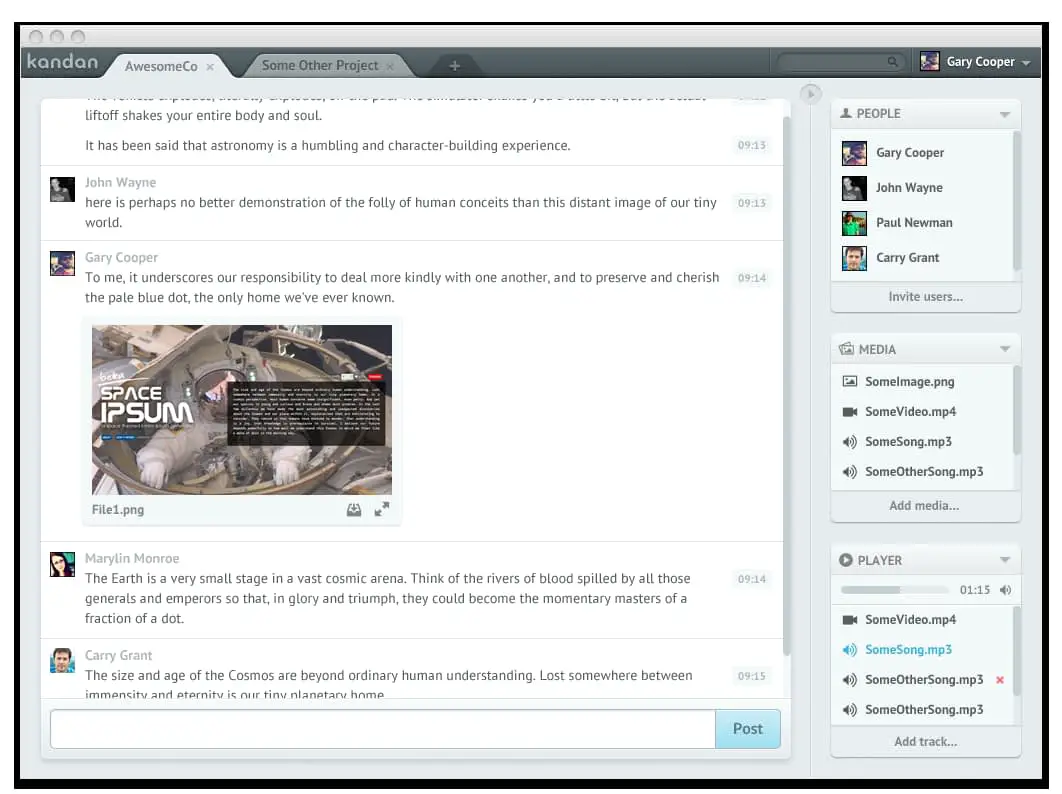
The chat window which you see above was designed by Sacha in his ebook. As of today, I am not really planning to redesign this window. I am just planning to clean it up a bit and make it consistent with my design.
With the Create feature design complete, the next scope item was to let the user rename the Conversation.
Designing the Edit Conversation Action
The original scope of the project was to just provide a Rename Conversation feature. But when I was designing the Hall page of Kandan, I realized that instead of just providing the Rename feature, the design can be tweaked slightly to let the user edit the Conversation.
This would satisfy the scope of the project as well as provide an additional feature. The user could potentially edit the privacy setting of the Conversation too.
Plus, providing an Edit feature also enabled me to reuse the Create Conversation dialog design.
Trying to reuse existing UIs not only helps in making the web application design consistent but also reduces some development cost.
With this mind, I had incorporated the Edit icon on the card.
Clicking the Edit icon will launch the Edit Conversation dialog which is similar to the Create Conversation dialog.
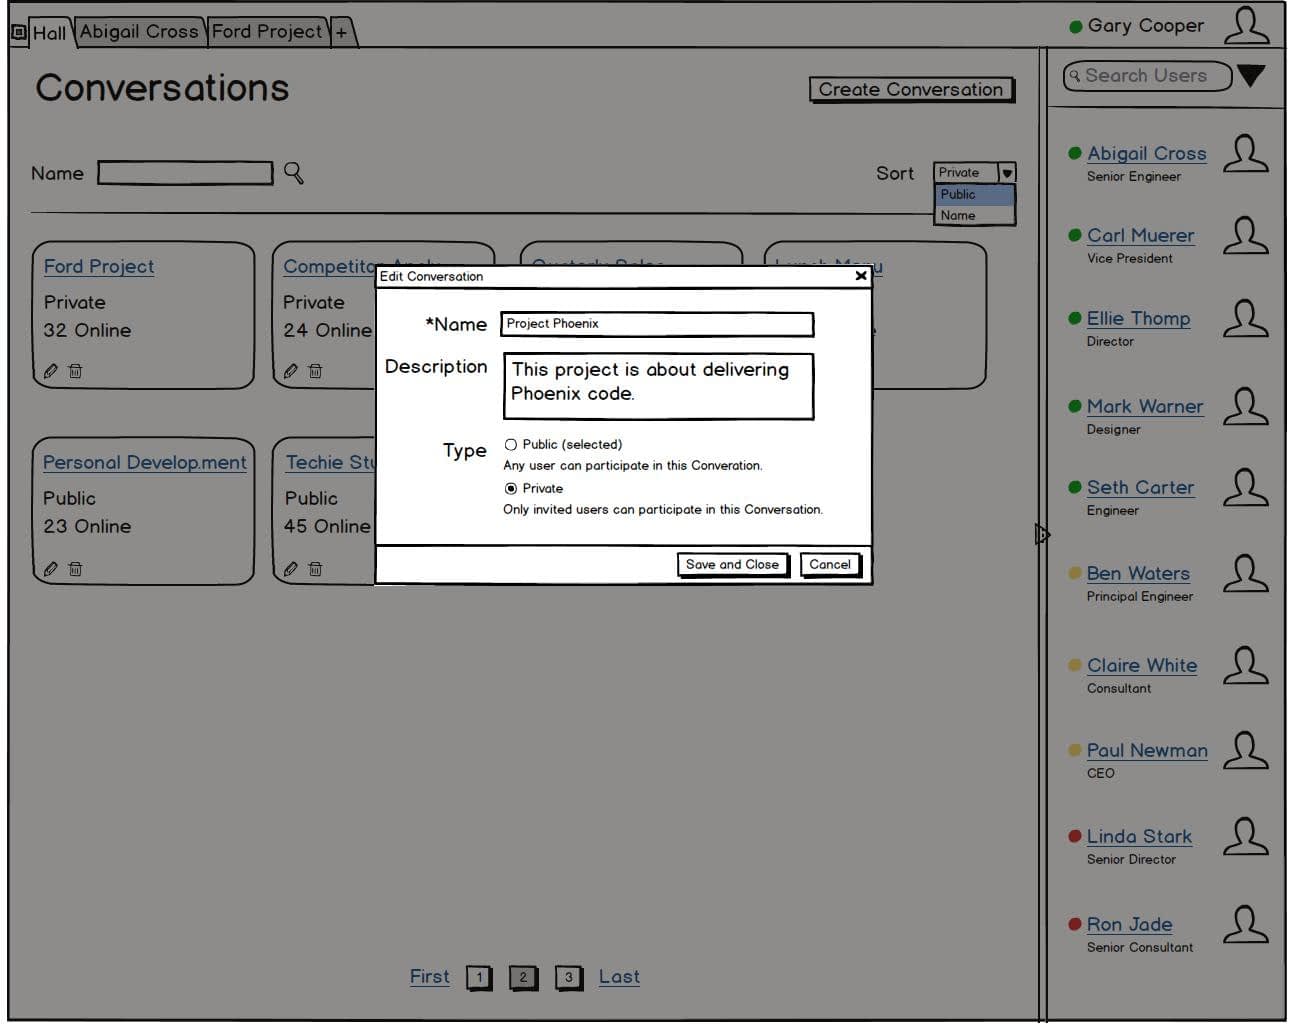
The user can quickly edit the name, description or privacy policy of the Conversation. Rest of the UI elements remain the same as in Create Conversation popup.
Did you see how reusing the Create dialog UI made the design of Edit dialog simpler?
Designing the Delete Conversation Action
Delete is usually the most simplest to design. All you have to decide is whether the delete action will result in completely deleting the object from the application or you need to archive that object but not show it to the user. The archived object can be made accessible to the Administrators.
In our case, during scoping of the project, I had planned to allow the users to delete the Conversations. So I went ahead with the approach of deleting the Conversation completely from the application.
Keep in mind that if I was designing a web application for a client, I would not take this approach. I would have archived the Conversation and let the Administrator take the call of actually deleting it.
If you remember the card design of Conversations, I had already provided a Delete icon on it so that the users can take delete the Conversation.
Now, since I am letting the users take the delete action, I wanted to let the user know what the consequences of the Delete action will be.
So I introduced a Warning message which basically tells the user that the delete action will delete the Conversation as well any files associated with it.
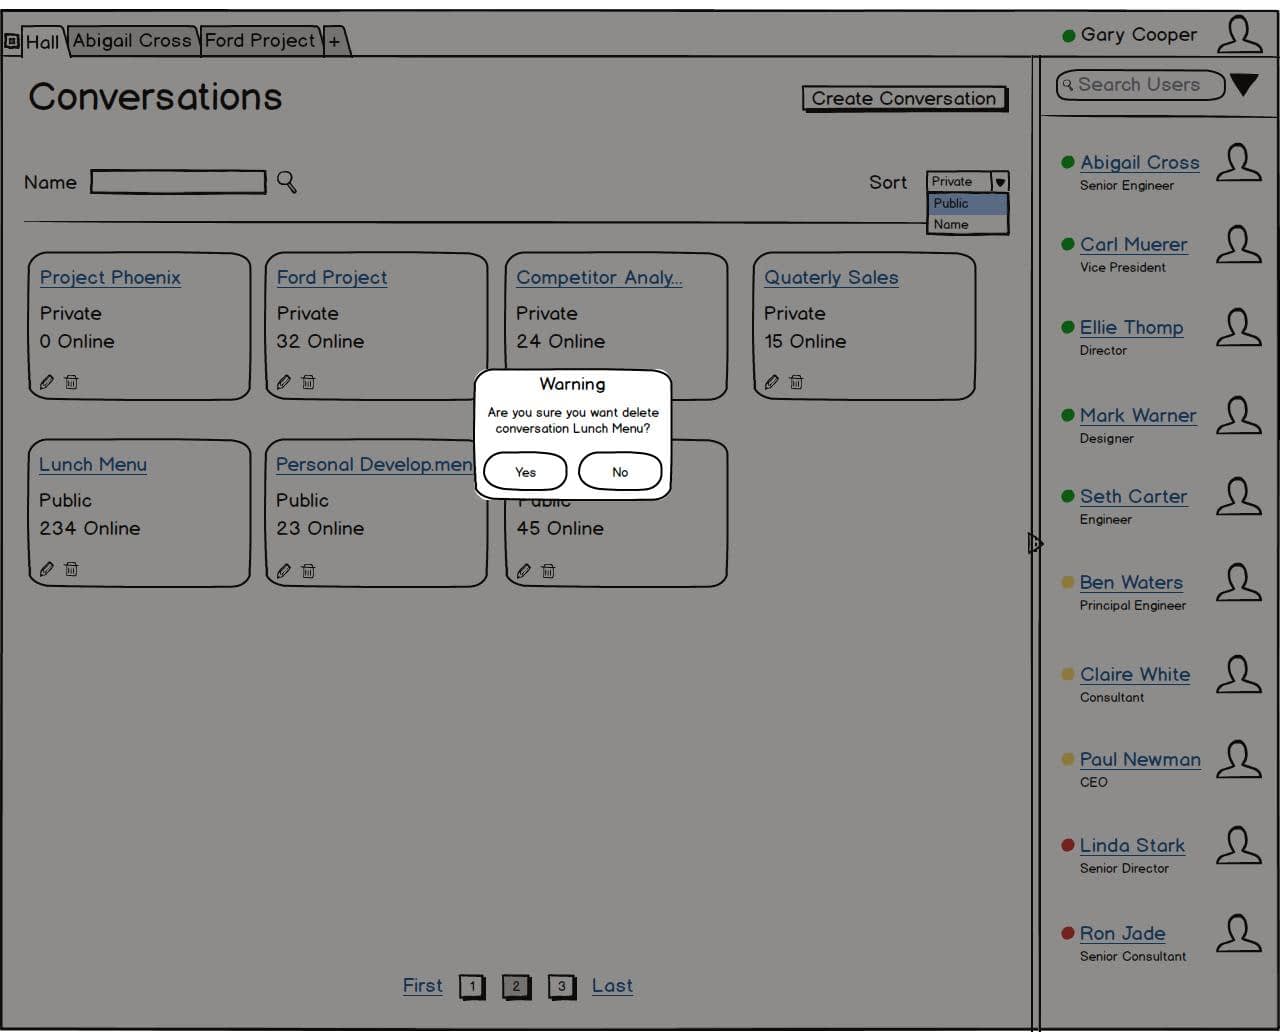
Clicking Yes button in the Warning dialog will delete the Conversation as well as all the files associated with the Conversation. Clicking No button will place the user back on the Hall page and will not delete the Conversation.
This completes the design of the Create, Edit and Delete features.
The Design So Far
This is how the design looks so far.
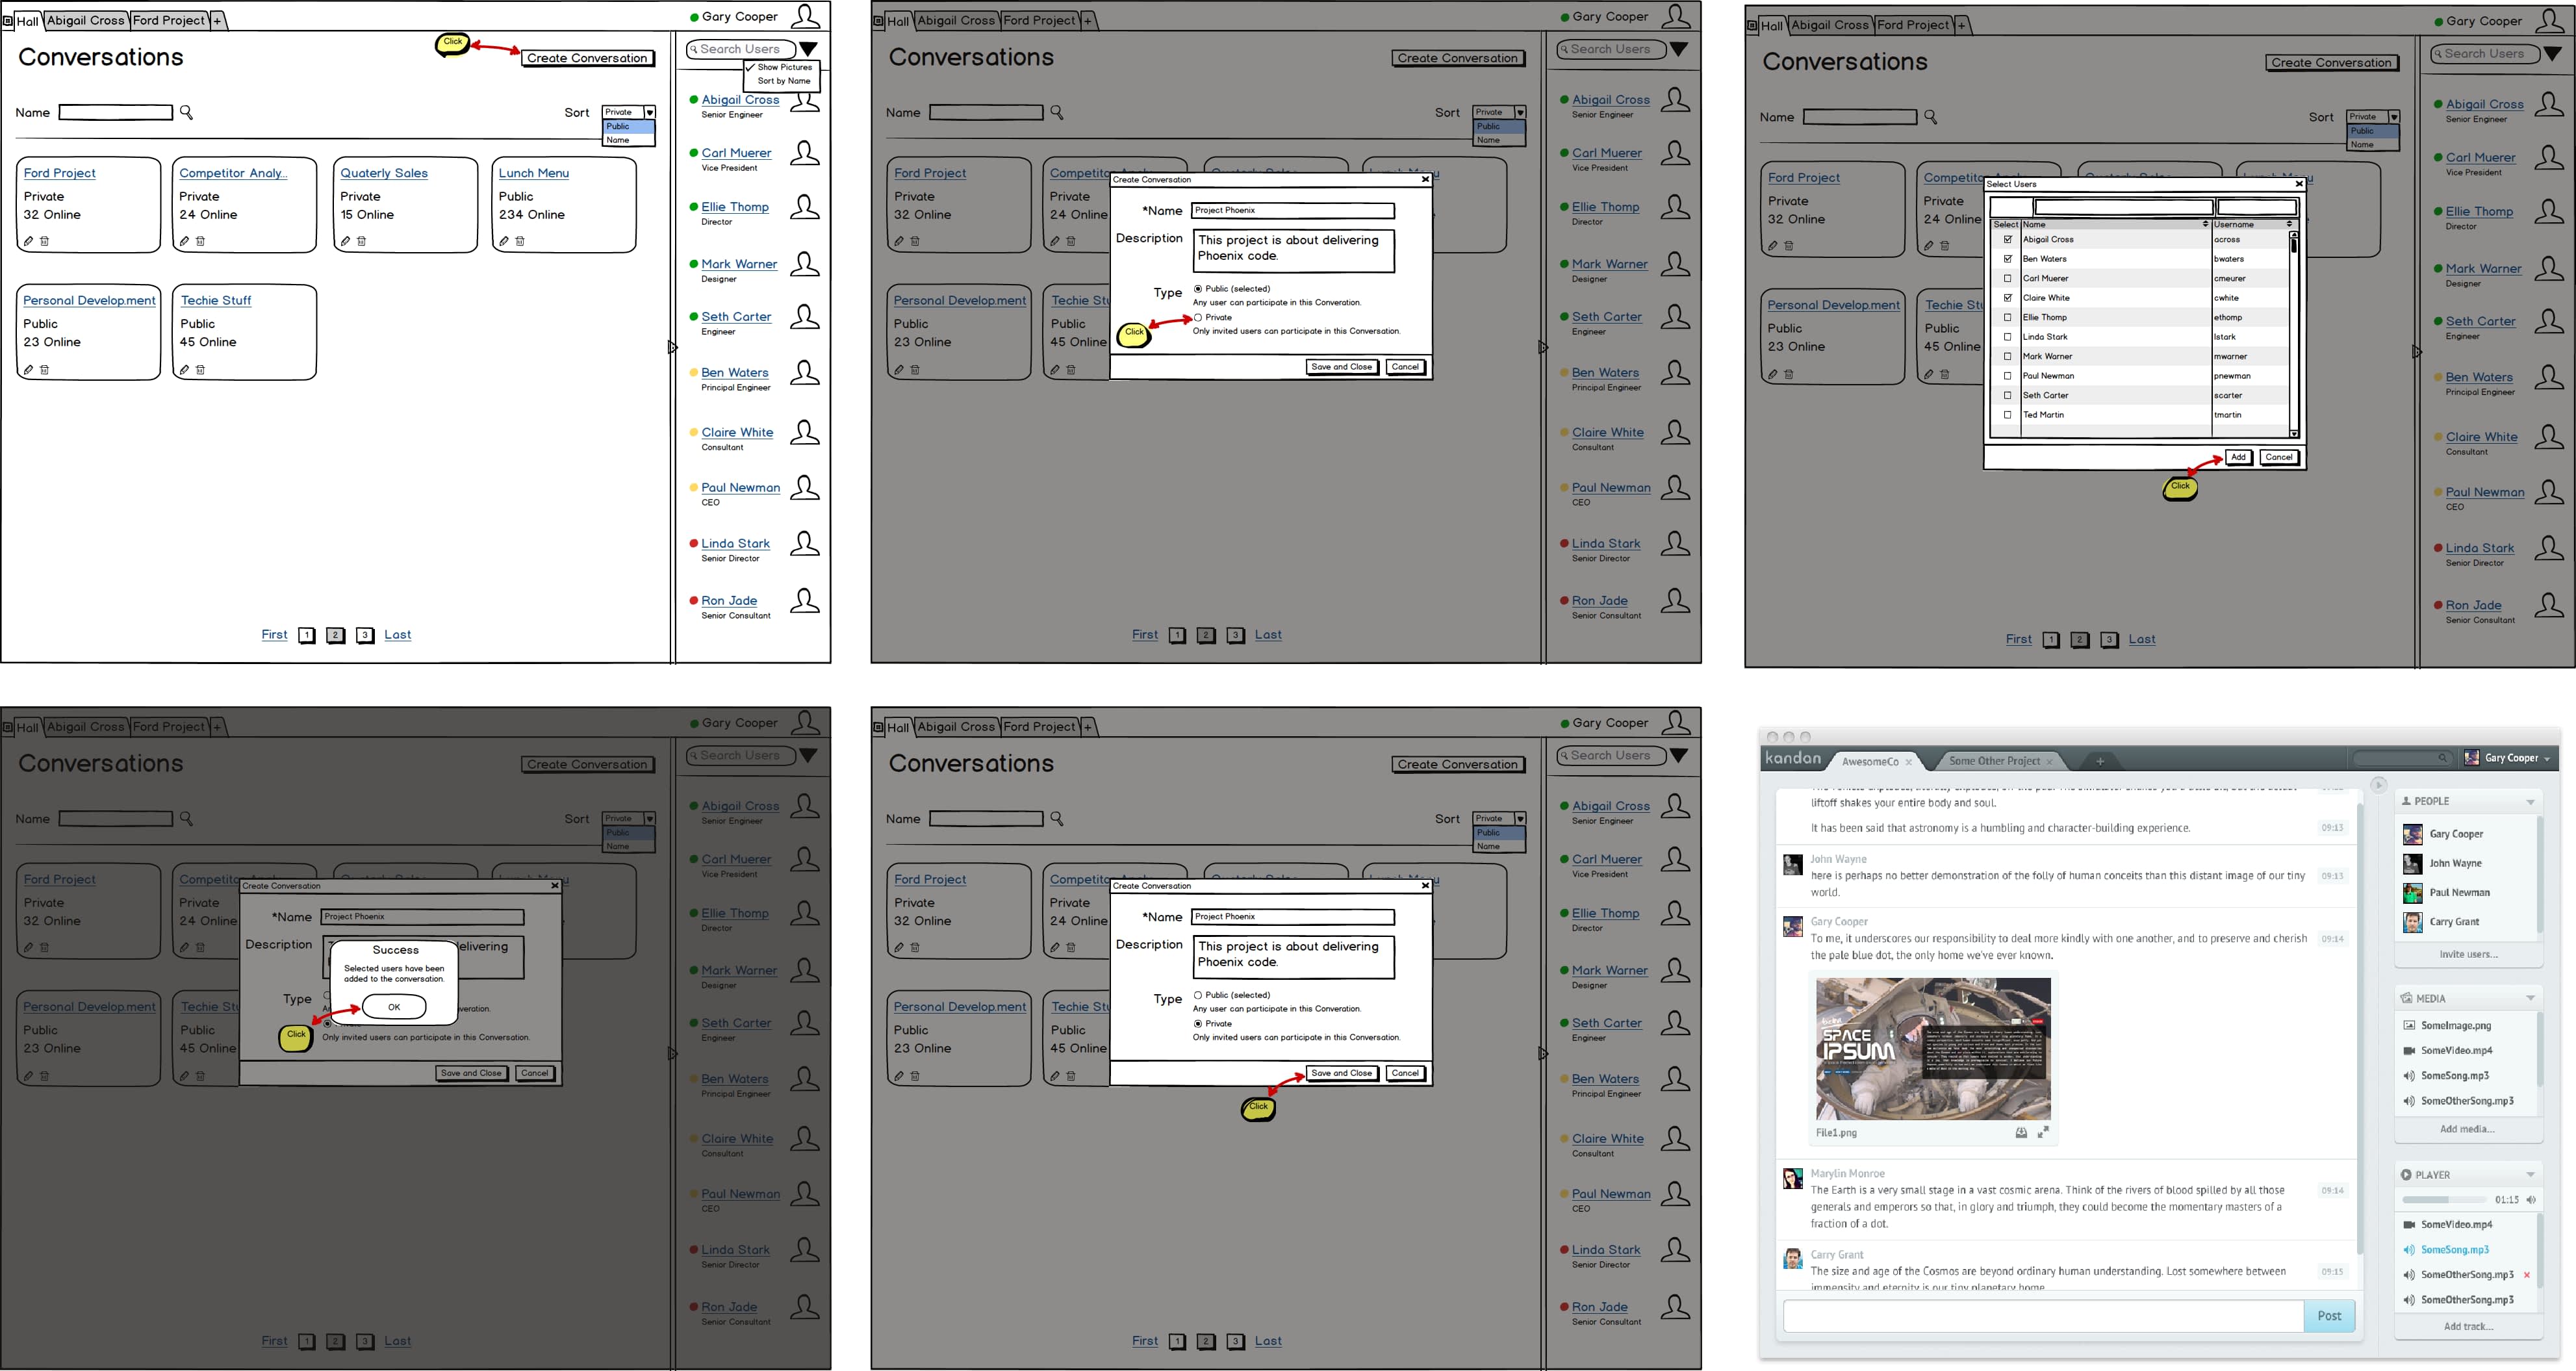
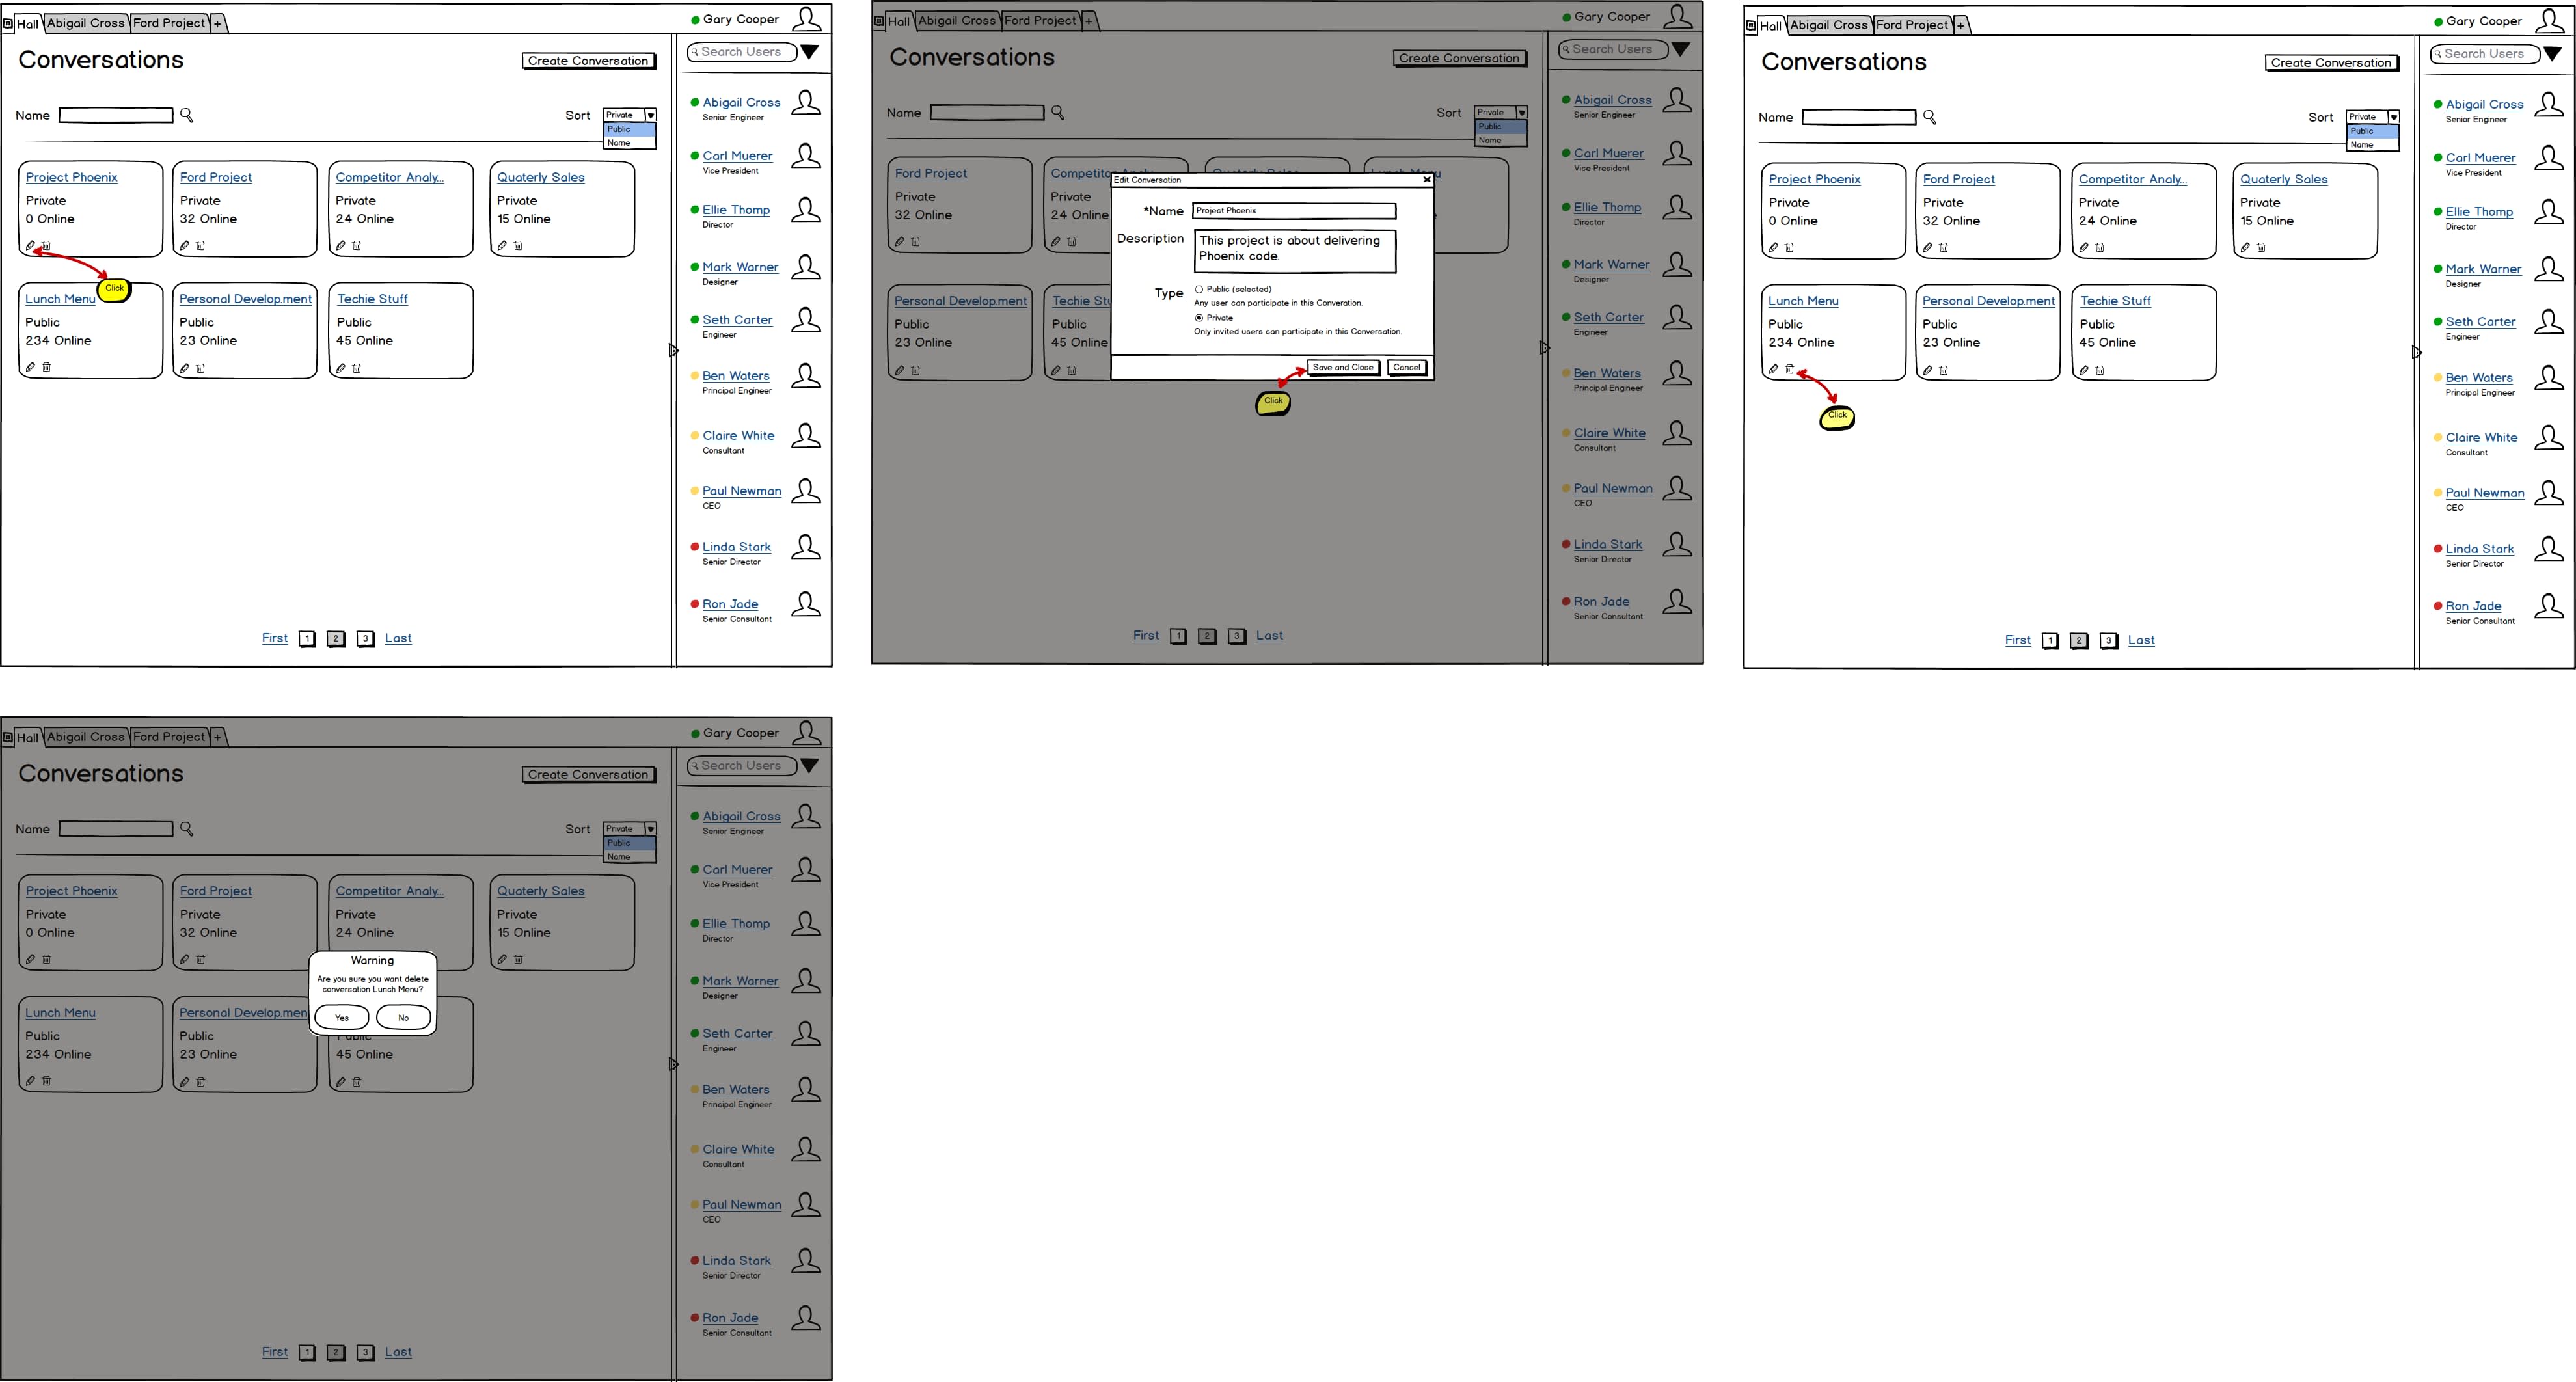
Read the wireframe from left to right and you will see how the entire flow of this web application will be once the user has logged in.
Someday I will discuss about advantages of creating such kind of wireframes over working prototypes and why I think styling the UIs during the design phase is not such a good idea.
Do you think this design can be improved further? Do you have any thoughts or suggestions? Let me know in the comments below.
Next time I will design the Notifications feature of Kandan. This will be followed by streamlining the core chat window designed by Sacha and designing the Private Message window. And finally we will wrap up the design by designing the Search feature and Admin panel.
I hope you are enjoying reading this web application design case study as much as I am enjoying writing it. If so, please share this project with anyone you think would enjoy reading this case study. I will really appreciate that.